How to Unclog a Bathroom Sink Drain: Simple Methods That Work
How to Unclog a Bathroom Sink Drain: Step-by-Step Guide If water is pooling in your basin, learning how to unclog a bathroom sink drain can save time and...
In this article
If water is pooling in your basin, learning how to unclog a bathroom sink drain can save time and money. Most bathroom sink clogs come from hair, soap scum, toothpaste, and small debris stuck near the drain opening or in the trap. With a few basic tools and safe methods, you can usually clear the blockage yourself.
This guide walks you through the easiest fixes first, then shows you how to open the drain and trap if needed. You will also learn when to stop and call a professional for your safety and to protect your plumbing.
Getting Ready: Safety and Tools for Unclogging a Bathroom Sink
Bathroom sink drains are usually small and shallow, so many clogs sit close to the top. That makes do-it-yourself repairs easier than many people expect. Still, you should prepare properly to avoid damage or injury while you work.
Gathering the right tools at the start helps you work faster and keeps the area cleaner. You likely own most of what you need already, and a short checklist keeps you from missing anything important.
Basic tools and supplies you should have on hand
Here is a simple checklist of tools and supplies that help unclog a bathroom sink drain safely and efficiently:
- Rubber gloves and an old towel or rags
- Small bucket or bowl for catching water
- Cup plunger (with a flat bottom)
- Flashlight and an old toothbrush
- Plastic drain snake or zip tool for hair clogs
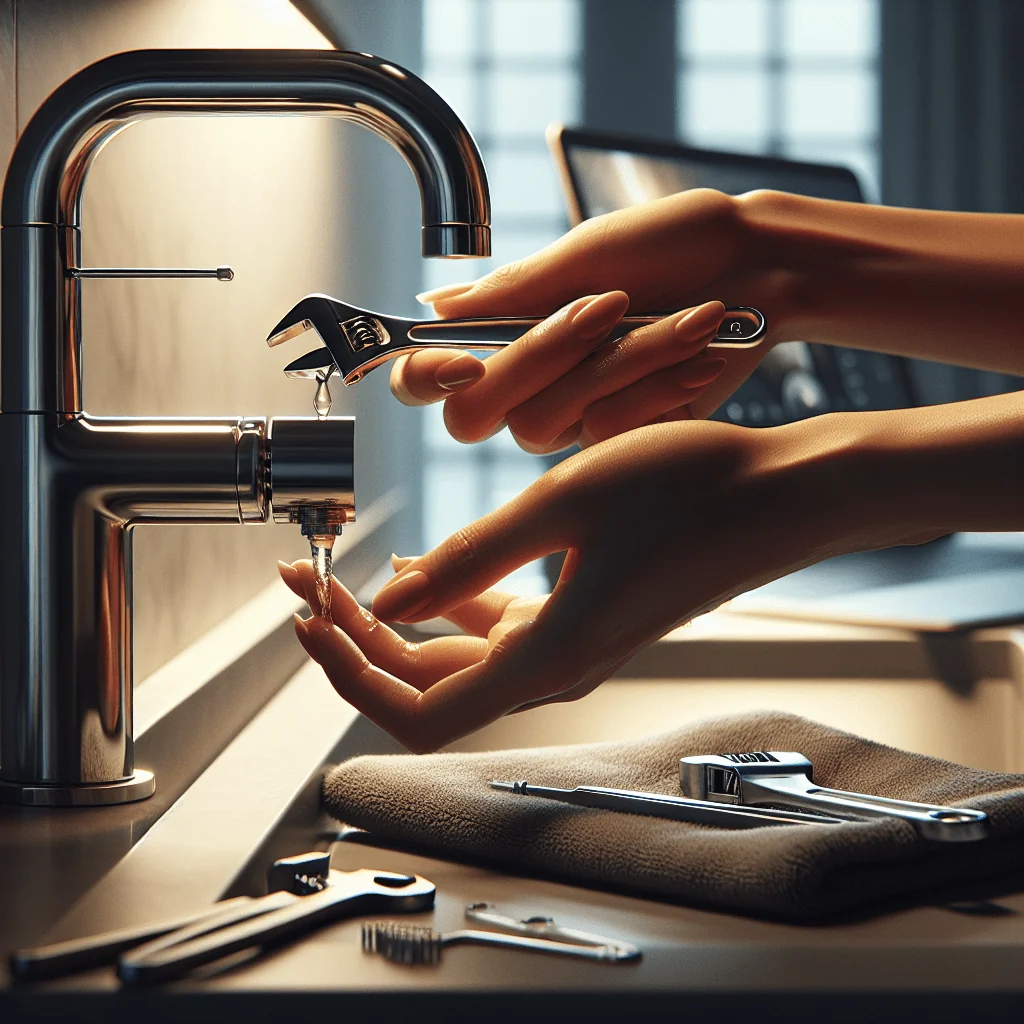
- Adjustable wrench or pliers for the P-trap
- Baking soda and vinegar for light buildup
Once you have these nearby, you can move through each method in order, from least invasive to most involved, without stopping to search for tools or supplies in the middle of a wet task.
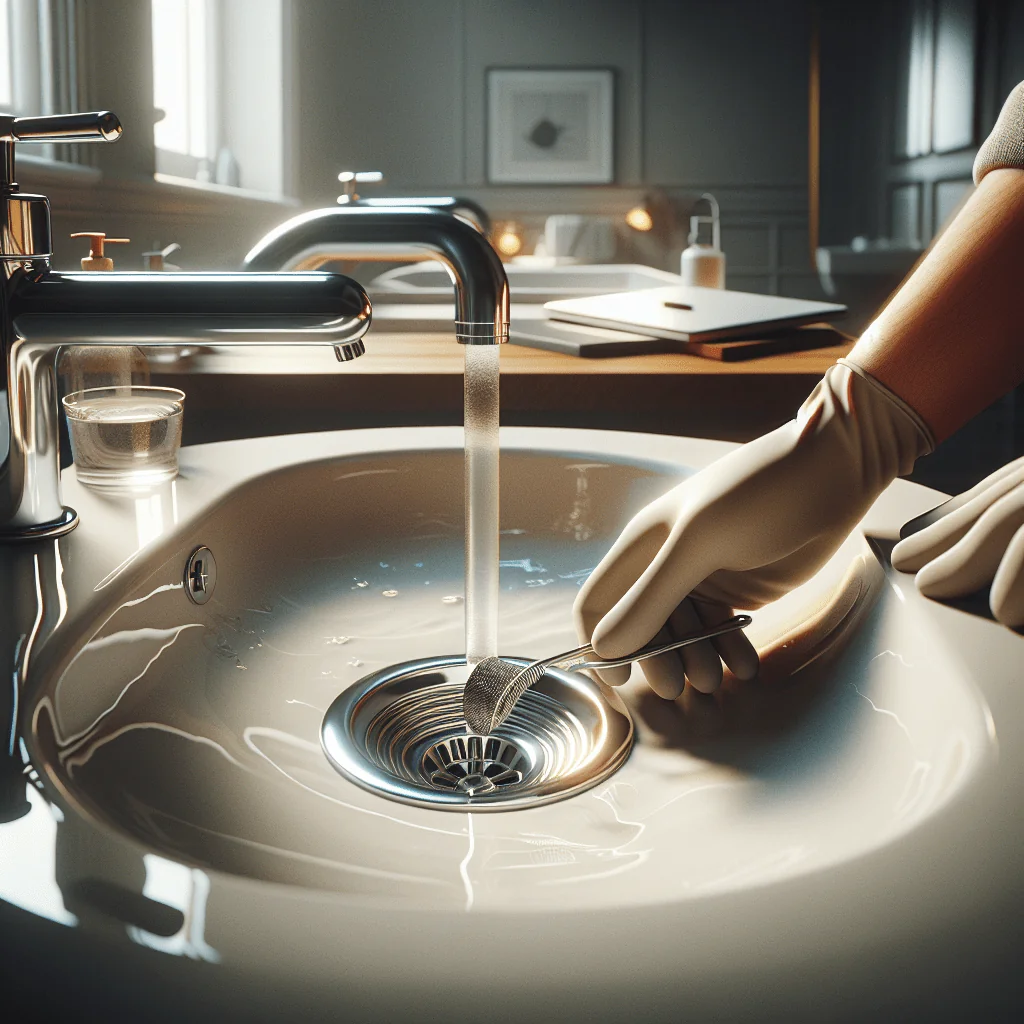
Step 1: Check the Stopper and Remove Visible Gunk
The most common cause of a slow or clogged bathroom sink is hair and debris caught around the stopper. This is the easiest place to check first and often solves the problem in minutes without touching any pipes under the sink.
Many modern bathroom sinks have a lift-rod stopper that connects to a metal rod under the sink. The stopper can usually be pulled out or released from below with a small nut that holds the rod in place.
How to clean the stopper and upper drain
Follow these simple actions to clear clogs at the stopper before you move on to deeper fixes:
- Clear the area and protect the sink. Remove items from the countertop. Put on gloves and place a towel around the sink edge.
- Lift or remove the stopper. Try pulling the stopper straight up. If it does not come out, go under the sink, find the horizontal rod that connects to the drain, and loosen the small nut holding it. Then pull the rod out and remove the stopper from above.
- Clean the stopper and drain opening. Use an old toothbrush or paper towel to remove hair, soap scum, and sludge from the stopper and the visible part of the drain.
- Flush with hot water. Run hot tap water for 30–60 seconds to see if the drain now flows freely.
If the water drains well after this step, reinstall the stopper and you are done. If the sink is still slow or backed up, move to the next method to reach clogs deeper in the pipe below the stopper assembly.
Step 2: Use a Plunger on the Bathroom Sink Drain
Plunging can dislodge soft clogs deeper in the drain line, especially those made of hair and soap. Use a small cup plunger, not a toilet plunger, for the best seal on a bathroom sink and to keep the work cleaner.
To get good suction, you need some standing water in the basin and the overflow opening blocked so air does not escape around the plunger cup.
Plunging technique for a bathroom sink
Use this sequence to get the most force from a plunger without damaging the sink or drain parts:
- Block the overflow hole. Locate the overflow opening near the top of the sink bowl. Cover it tightly with a wet cloth or tape to prevent air from escaping.
- Add water to the sink. Fill the sink with a few centimeters of warm water. The plunger cup should be fully covered.
- Position the plunger. Place the plunger over the drain, making sure the cup seals well on the sink surface.
- Plunge in short, firm strokes. Push down and pull up quickly for 15–20 seconds without breaking the seal. Start gently, then increase force slightly.
- Test the drain. Lift the plunger and see if water drains faster. Repeat the plunging cycle a few times if needed.
If plunging improves the flow, run hot water for a minute to flush out loosened debris. If there is no change, the clog may be tangled hair that needs to be hooked or snaked out with a simple plastic tool.
Step 3: Use a Drain Snake or Hair Removal Tool
Plastic drain snakes and zip tools are made for hair clogs in bathroom sinks and tubs. They are cheap, flexible, and designed to grab hair without damaging the pipe or scratching the drain opening.
Always insert these tools gently to avoid scratching metal drains or forcing the clog deeper into the plumbing line, where it becomes harder to reach.
Snaking the bathroom sink drain safely
Use a drain snake or hair removal tool in short passes so you can pull out hair and buildup in stages:
- Remove the stopper if you have not already. You need clear access to the drain opening for the snake.
- Insert the snake into the drain. Feed the tool slowly down the drain. When you feel resistance, you likely reached the clog or a bend in the pipe.
- Twist and pull back. Wiggle and twist the snake, then pull it out carefully. Remove hair and debris from the tool and discard in the trash, not the drain.
- Repeat as needed. Run the snake down several times until you no longer pull up hair.
- Flush with hot water. Run hot water for 1–2 minutes to clear remaining buildup.
If the sink now drains well, clean the area and reinstall the stopper hardware. If the clog remains, the blockage may sit in the P-trap under the sink or farther along the drain line inside the wall.
Step 4: Clean the P-Trap Under the Bathroom Sink
The P-trap is the curved section of pipe under the sink that holds water to block sewer gas. Hair, toothpaste, and debris often collect there and cause a clog that simple plunging or snaking from above will not reach.
Before you start, check the pipe material. Plastic traps are easier to remove than metal ones, which may be old or corroded and need extra care during removal and reassembly.
Removing and cleaning the P-trap
Work slowly when you open the P-trap so you do not crack fittings or spill dirty water on the cabinet floor:
- Place a bucket under the trap. Put a small bucket or bowl directly under the P-shaped bend to catch water and debris.
- Loosen the slip nuts. Use your hand or an adjustable wrench to loosen the nuts at each end of the P-trap. Turn slowly to avoid cracking plastic or bending thin metal.
- Remove the trap. Gently lower the trap into the bucket. Expect dirty water and sludge to spill out.
- Clean the trap thoroughly. Use a bottle brush, old toothbrush, or small tool to remove all buildup from inside the trap. Rinse with warm water.
- Check the pipes on both sides. Shine a flashlight into the wall pipe and the tailpiece from the sink. Remove any visible blockages with a small brush or snake.
- Reassemble the trap. Reattach the trap, making sure the washers are seated correctly and the slip nuts are snug but not over-tightened.
- Test for leaks and drainage. Run water for several minutes while watching the trap. Tighten slightly if you see drips.
If the clog was in the trap, the sink should now drain normally. If water still backs up, the blockage may be deeper in the wall line, which often requires a longer snake or professional help with more advanced tools.
Optional Step: Baking Soda and Vinegar for Light Clogs
For minor slow drains caused by soap and mineral buildup, a baking soda and vinegar treatment can help. This method is gentle and useful as a maintenance step after you remove hair and debris by hand or with a snake.
Do not use this method right after chemical drain cleaners, and avoid mixing different chemical products together, as that can create fumes or harsh reactions.
Using baking soda and vinegar safely
Use this simple mixture only on drains that still move water slowly, not on fully blocked sinks:
- Pour baking soda into the drain. Add about half a cup of baking soda directly into the drain opening.
- Add vinegar slowly. Pour about half a cup of white vinegar into the drain. The mixture will fizz.
- Cover and wait. Place a plug or cloth over the drain and let the mixture work for 10–15 minutes.
- Flush with hot water. Run hot tap water for several minutes to rinse away loosened residue.
This method will not clear heavy hair clogs, but it can improve flow and reduce odors in a bathroom sink that is only slightly slow and already free of large debris.
Why Chemical Drain Cleaners Are a Last Resort
Many people reach for chemical drain cleaners first, but these products carry risks. Strong cleaners can damage older pipes, harm finishes, and cause burns if they splash on your skin or in your eyes.
Chemicals can also sit in the trap if the clog does not clear, leaving a pool of corrosive liquid under your sink. That makes later manual work more dangerous for anyone who has to open the pipes.
Safer choices compared with harsh cleaners
This comparison shows why manual methods are usually a better first choice than strong chemical products:
Comparison of common bathroom sink unclogging methods
| Method | Best use | Risks |
|---|---|---|
| Stopper cleaning | Hair and sludge near drain opening | Low risk when done gently |
| Plunging | Soft clogs slightly deeper in the line | Possible splashing if seal is poor |
| Drain snake | Hair clogs below stopper and in trap | Can scratch metal if forced |
| P-trap cleaning | Heavy buildup in curved pipe section | Leaks if joints are not sealed well |
| Chemical cleaner | Last attempt for minor buildup | Pipe damage, skin burns, fumes |
If you choose to use a chemical cleaner, read the label carefully, wear protection, and never mix products. If the clog remains after one treatment, do not add more. Instead, contact a licensed plumber who can work safely with the chemicals already in the line.
How to Prevent Future Bathroom Sink Clogs
Once you learn how to unclog a bathroom sink drain, preventing the next clog becomes easier. A few simple habits can keep hair and sludge from building up again too quickly in the same section of pipe.
Prevention is usually faster and cleaner than another full drain disassembly, and it reduces the chance of water damage inside the vanity cabinet.
Simple habits that keep your drain clear
Adopt these easy habits to reduce bathroom sink clogs and keep water flowing smoothly:
- Use a drain screen or hair catcher over the sink drain.
- Clean the stopper regularly to remove hair and soap film.
- Avoid washing large amounts of hair or thick products down the sink.
- Run hot water for 20–30 seconds after shaving or brushing teeth.
- Use a mild baking soda and hot water rinse once a month.
These small steps help keep the drain clear and extend the time between major cleanings. They also make any future clogs easier to clear because less material has built up inside the pipes.
When to Call a Professional Plumber
Most bathroom sink clogs clear with the methods above, especially if you work through them in order. However, some signs point to a bigger problem in the plumbing system or venting that needs expert attention and more advanced tools.
Knowing when to stop do-it-yourself efforts protects your pipes, prevents damage to finishes, and keeps you safe from hidden hazards inside the plumbing.
Warning signs that mean you should stop DIY work
Call a professional plumber if you notice any of these patterns while trying to unclog a bathroom sink drain:
- Repeated clogs soon after cleaning the stopper and trap
- Water backing up in other fixtures when the sink drains
- Strong sewer smells from several drains in the home
- Gurgling sounds in nearby drains when water runs
- No improvement after plunging, snaking, and cleaning the P-trap
These signs can point to a deeper blockage, venting problem, or pipe damage that needs proper inspection. In those cases, a trained plumber can diagnose the cause and clear the line without putting your plumbing system at further risk.